Okay, I'm totally behind on my HOLIDAY FREEBIE FESTIVAL daily picks but I've got two good reasons that I can't share just yet. Stay tuned for the scoop on why I've been so busy but in the meantime, here are a whole bunch of fabulous freebies in one post to cover days 14, 15 and 16.
Up first is this trio of Keep Calm art prints from Craftily Ever After.
You can download all three and hang them together like in the photo above or just choose one. Either way, you've got a simple and inexpensive way to make your house more festive in no time at all!
For some more wall art options, head over to Agape Love Designs for one of these two fun prints - Merry Christmas to All...
And Keep Calm and Kiss On.
Over at Occasionally Crafty, you can download Keep Calm and Jingle On.
And Kara from Mine for the Making designed a Jingle On print too.
With coordinating Get Your Hot Chocolate On:
And Get Your Smooch On prints too:
Aren't all of these fun?
If you have a free holiday printable you'd like to share, enter it into the link up below!
*If you are reading this in via our e-mail newsletter or RSS feed, the link up won't show up. You have to visit the post on our website to view it.
Showing posts with label Christmas. Show all posts
Showing posts with label Christmas. Show all posts
Thursday, December 16, 2010
Sunday, December 12, 2010
Holiday Freebie Festival, Day 12! {FREEBIES}
We've got almost 100 free printables in our HOLIDAY FREEBIE FESTIVAL now and they include everything from gift tags and artwork to kid's activities and games. So many fun files to choose from!
My pick for Day 12 is from Kim over at seven thirty three and it's perfect for reminding your little ones that Santa's always watching.
Yup, that's a letter FROM Santa. There are lots of templates for letters TO the big guy, but Kim has created some letterhead with an official Santa's Workshop Seal that will convince your kids it's the real thing.
So with less than two weeks to go until Santa's supposed to arrive, you can use this letter to remind your children of all of the things they need to work on if they expect to see anything under the tree on Christmas Day. I know, it's kind of mean, but whatever keeps them in line, right?
Download the template for Santa's Letterhead at seven thirty three and if you have a free holiday printable you'd like to share, enter it into the link up below!
*If you are reading this in via our e-mail newsletter or RSS feed, the link up won't show up. You have to visit the post on our website to view it.
Saturday, December 11, 2010
Holiday Freebie Festival, Day 11! {FREEBIES}
It's Day 11 of our HOLIDAY FREEBIE FESTIVAL and today's pick from the link up is a great holiday craft to do with your kiddos from Catholic Icing - a DIY Nativity Set!
Print out the coloring pages and let your children do their thing. Then cut out the different people and animals, glue them to toilet paper or paper towel rolls and your little ones will have a nativity set they can play with to their heart's content.
Is that a great idea or what? Such a fun way to teach children what Christmas is really about.
Download the coloring sheets and get the full how-to at Catholic Icing and if you have a free holiday printable you'd like to share, enter it into the link up below!
*If you are reading this in via our e-mail newsletter or RSS feed, the link up won't show up. You have to visit the post on our website to view it.
Tuesday, December 7, 2010
PROJECT SECRET SANTA: Four Cookie Recipes You'll Want to Make {FREEBIES}
As part of PROJECT SECRET SANTA, I reached out to some of my favorite bakers and asked them to share some secrets and recipes to help all of you with your holiday gifting and baking.
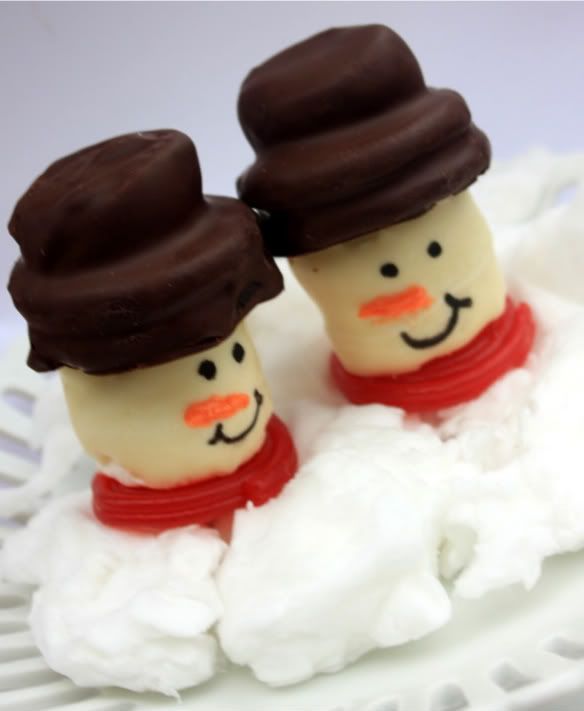
Today, I've got some amazing recipes from one of my blog buddies, Stacy from Scrumptious Swirls. I had the pleasure of meeting her at the Martha Stewart Blogger Event back in August and to say that she's as sweet as the confections she conjures up would be an understatement. Stacy is extremely talented and a nice person to boot which is why I love her so much. And you won't believe the divine things she comes up with! I mean really, how super duper cute are these Oreo Marshmallow Snowmen?
LOVE! Okay, let's turn over this post to Stacy and her fabulous sweets.
I absolutely love baking during the Holidays and enjoy giving tins of cookies as gifts to my daughter’s teachers, my hair stylist, neighbors & family. I also enjoy cookie exchange parties! I hosted my first last year and I thoroughly enjoyed tasting my friends sweet treats and learning of some new cookies. So here are four of my favorite recipes to get your holiday baking started!
BISCOTTI
Biscotti is such a great cookie to make especially during the holidays because it makes for great gifts! They're perfect with your morning coffee or your evening tea.
This recipe comes from the website Allrecipes.com. You can chop nuts into this recipe, and instead of the anise extract add almond flavoring or maybe some vanilla. Some biscotti recipes can be challenging or intimidating…this one is not at all!
INGREDIENTS:
1/2 cup vegetable oil
1 cup white sugar
3 1/4 cups all-purpose flour
3 eggs
1 tablespoon baking powder
1 tablespoon anise extract, or 3 drops anise oil
DIRECTIONS:
Preheat the oven to 375 degrees F (190 degrees C). Grease cookie sheets or line with parchment paper.
In a medium bowl, beat together the oil, eggs, sugar and anise flavoring until well blended. Combine the flour and baking powder, and stir into the egg mixture to form a heavy dough. Divide dough into two pieces. Form each piece into a roll as long as your cookie sheet. Place roll onto the prepared cookie sheet, and press down to 1/2 inch thickness.
Bake for 25 to 30 minutes in the preheated oven, until golden brown. Remove from the baking sheet to cool on a wire rack. When the cookies are cool enough to handle, slice each one crosswise into 1/2 inch slices. Place the slices cut side up back onto the baking sheet. Bake for an additional 6 to 10 minutes on each side. Slices should be lightly toasted.
RUGELACH
This is my favorite cookie! Not so easy but the end result is AMAZINGLY SCRUMPTIOUS to say the least! Just remember - they don't have to be perfect. Honestly, it took me a few times making these to get the hang of making them pretty but the taste not matter what is the best!!This recipe is also from Allrecipes.com and if you haven't made Rugelach before, read the comments at the bottom for some tricks!
Make sure you chill the dough over night! The recipe says 2 hours, but I tried that once and it didn’t work so well. When it says to wrap each disk, use parchment paper to cover, then wrap the disk in plastic wrap. When you roll again, keep it on parchment paper and roll it with a piece on top. Chop the filling in the food processor too - makes it easier and well blended!
Oh, and I don’t use the raisins - I use Chocolate Chips ;)
INGREDIENTS:
2 cups all-purpose flour
1/4 teaspoon salt
1 cup unsalted butter
1 (8 ounce) package cream cheese
1/3 cup sour cream
1/2 cup white sugar
1 tablespoon ground cinnamon
1 cup finely chopped walnuts
1/2 cup raisins
DIRECTIONS:
Cut cold butter or margarine and cream cheese into bits. In food processor, pulse flour, salt, butter or margarine, cream cheese and sour cream until crumbly.
Shape crumbly mixture into four equal disks. Wrap each disk and chill 2 hours or up to 2 days.
Roll each disk into a 9-inch round, keeping other disks chilled until ready to roll them.
Combine sugar, cinnamon, chopped walnuts, and finely chopped raisins (may substitute miniature chocolate chips for raisins).
Roll each disk into a 9 inch round keeping other disks chilled until ready to roll them. Sprinkle round with sugar/nut mixture. Press lightly into dough. With chefs knife or pizza cutter, cut each round into 12 wedges. Roll wedges from wide to narrow, you will end up with point on outside of cookie. Place on ungreased baking sheets and chill rugelach 20 minutes before baking.
Preheat oven to 350 degrees.
After rugelach are chilled, bake them in the center rack of your oven 22 minutes until lightly golden. Cool on wire racks. Store in airtight containers and they freeze very well.
Variations: Before putting the filling on the dough, use a pastry brush to layer apricot jam as well as brown sugar. Then add the recommended filling. You may also make a mixture of cinnamon and sugar and roll the rugelach in this prior to putting them on the cookie sheets.
These are great cookies if you want an alternative to sugar cookies. I make these in addition at the holidays for my cut out cookies and decorate them! Again with this cookie, when chilling wrap it in parchment paper, and for easier & cleaner rolling out use parchment paper.
Recipe via Joy of Baking (makes about 20 cookies)
INGREDIENTS:
1 1/2 cups (260 grams) all-purpose flour
½ cup of corn starch
1/4 teaspoon (2 grams) salt
1 cup (2 sticks) (226 grams) unsalted butter, room temperature
1/2 cup (60 grams) powdered (confectioners or icing) sugar
1 teaspoon (4 grams) pure vanilla extract
DIRECTIONS:
In a separate bowl whisk the flour & corn starch with the salt. Set aside.
In the bowl of your electric mixer (or with a hand mixer), beat the butter until smooth and creamy (about 1 minute). Add the sugar and beat until smooth (about 2 minutes). Beat in the vanilla extract. Gently stir in the flour mixture just until incorporated. Flatten the dough into a disk shape, wrap in plastic wrap, and chill the dough for at least an hour.
Preheat oven to 350 degrees with the rack in the middle of the oven.
Line two baking sheets with parchment paper. On a lightly floured surface roll out the dough into a 1/4 inch (.6 cm) thick circle. Cut into rounds or other shapes using a lightly floured cookie cutter. Place on the prepared baking sheets and place in the refrigerator for about 15 minutes. (This will firm up the dough so the cookies will maintain their shape when baked.)
Bake for 8 - 10 minutes, or until cookies are very lightly browned. Cool on a wire rack.
Shortbread cookies with keep in an airtight container for about a week or they can be frozen.
CHOCOLATE ESPRESSO SNOWCAPS
What would a cookie exchange party be with out a Martha Stewart recipe?!
Recipe & notes via Martha Stewart (makes 18)
These cookies look like little snow-covered mountains. They will keep for up to a week stored in an airtight container at room temperature. Roll each ball in confectioners' sugar twice to make sure it's thoroughly coated and no dark dough is visible.
INGREDIENTS:
1/2 cup all-purpose flour
1/4 cup unsweetened cocoa powder
4 teaspoons instant espresso
1 teaspoon baking powder
1/8 teaspoon salt
4 tablespoons unsalted butter
2/3 cup packed light-brown sugar
1 large egg
4 ounces bittersweet or semisweet chocolate, melted and cooled
1 tablespoon milk
Confectioners' sugar, for coating
DIRECTIONS:
In a medium bowl, sift together flour, cocoa, espresso, baking powder, and salt. With an electric mixer, cream butter and brown sugar until light and fluffy. Beat in egg until well combined; mix in cooled chocolate. With mixer on low, gradually add flour mixture; beat in milk until just combined. Flatten dough into a disk; wrap in plastic. Freeze until firm, about 45 minutes.
Preheat oven to 350 degrees. Line two baking sheets with parchment. Shape dough into 1-inch balls. Pour confectioners' sugar (about 1/2 cup) into a medium bowl; working in batches, roll balls in sugar two times, letting them sit in sugar between coatings.
Place on prepared baking sheets, 2 inches apart. Bake until cookies have spread and coating is cracked, 12 to 14 minutes; cookies will still be soft to the touch. Cool cookies on a wire rack.
Thanks, Stacy! Don't those recipes make your mouth water? I'm not a baker but even I can't wait to get my hands in some flour to make some of these goodies for
And the blue and white Cookie Exchange Set is adorned with Ric Rac, which was actually inspired by Gabrielle and Alaina's birthday invitation.
A huge thank you to Stacy for sharing these fabulous sweets and the perfect free printables to go along with them. Be sure to check out Scrumptious Swirls for more wonderful recipes and party ideas!
This feature was written as part of AFOMFT's PROJECT SECRET SANTA to benefit Jack's Toy Drive. For more information on what it is, go HERE and if you'd like to buy a toy for a hospitalized child this holiday season, please visit the Jack's Toy Drive Amazon Wishlist. Prices start at just $1. Help put a smile on the face of a child who needs it this Christmas!
Images: Scrumptious Swirls, Joy of Baking, Martha Stewart & Anders Ruff
Holiday Freebie Festival, Day 7! {FREEBIES}
Thanks to everyone who's been spreading the word about our HOLIDAY FREEBIE FESTIVAL link up. The list keeps growing and I have the hardest time picking just one to feature each day!
Today, I'm going to highlight some adorable Holiday Message printables from Erin at Crafts & Sutch. There are so many fun ways you could use them - this set would be perfect to put in your child's lunch box or to use as gift tags:
And this set is just for that special someone! You know, the person you'd rather be naughty than nice with.
Visit Crafts & Sutch to download the files, and if you have a free holiday printable you'd like to share, enter it into the link up below!
*If you are reading this in via our e-mail newsletter or RSS feed, the link up won't show up. You have to visit the post on our website to view it.
Monday, December 6, 2010
Holiday Freebie Festival, Day 6! {FREEBIES}
Today's featured find from our HOLIDAY FREEBIE FESTIVAL link up will help you start a new Christmas tradition, not only with your family but in your neighborhood too! My friends Adria and Maureen at Anders Ruff have come up with this adorable "We've Been Elfed!" sign that's sure to get the holiday cheer flowing.
What does it mean? Well, Elfing is to Christmastime what Booing was to Halloween - you leave a basket or bag of treats on the doorstep of a friend or neighbor along with the sign and this poem, instructing them how to pass the Elfing on to someone else.
Before long, your whole neighborhood - or office! - will be showing off their Elf signs and enjoying their treats. Such a fun and easy way to spread the holiday spirit!
Visit Anders Ruff to download the sign and poem and if you have a free holiday printable you'd like to share, enter it into the link up below!
*If you are reading this in via our e-mail newsletter or RSS feed, the link up won't show up. You have to visit the post on our website to view it.
Saturday, December 4, 2010
Holiday Freebie Festival, Day 4! {FREEBIES}
Today's find from our HOLIDAY FREEBIE FESTIVAL link up may be my favorite so far! I'd never heard of St. Nick's Day before but from what I can gather, on the night of December 5th, people around the world leave shoes or empty stockings outside their door and the next morning, they are filled with treats from St. Nick. How fun is that?
Not all of us want our St. Nick leaving our kids candy, so Amber from Giver's Log has come up with the perfect alternative - fruit from Santa's orchard!
And lucky for us, she's created a free printable for the North Pole Orchards stickers.
Even if you don't celebrate St. Nick's Day, adding these stickers to your produce will remind your kids that you-knw-who is always watching!
Visit Giver's Log to download the template and if you have a free holiday printable you'd like to share, enter it into the link up below!
*If you are reading this in via our e-mail newsletter or RSS feed, the link up won't show up. You have to visit the post on our website to view it.
Wednesday, December 1, 2010
The Holiday Freebie Festival Begins! {FREEBIES}
I am totally amazed by all of the fabulous free printables that are out there for the holidays this year! I try to share a lot of them on our Facebook page but if you're anything like I am, you probably forget to bookmark them or you print them out and then forget where they were from when you want to share them with someone else. So I thought it would be great to have a one-stop spot where you can find them all, and where anyone who has created one can share it. And everyday throughout December, I'll post one from this link up here on AFOMFT. Hopefully, someone will come up with something New Year's themed so I'm not still sharing Christmas freebies on December 30th (hint, hint!).
So let's kick off this little HOLIDAY FREEBIE FESTIVAL with a very sweet print I saw this morning from Rebecca at Fresh Chick Design Studio. Isn't it adorable?
I love the cheerful colors and the fun patterns.
I've been meaning to try my hand at those glitter trees (check out this great tutorial from eighteen25) and now I have the perfect reason to get my glitz on!
Visit Fresh Chick Design Studio to download this print in 8.5 x 11 or 11 x 14, and if you have a free holiday printable you'd like to share, enter it into the link up below.
Friday, November 26, 2010
PROJECT SECRET SANTA: DIY Christmas Tree {TUTORIAL & DISCOUNT}
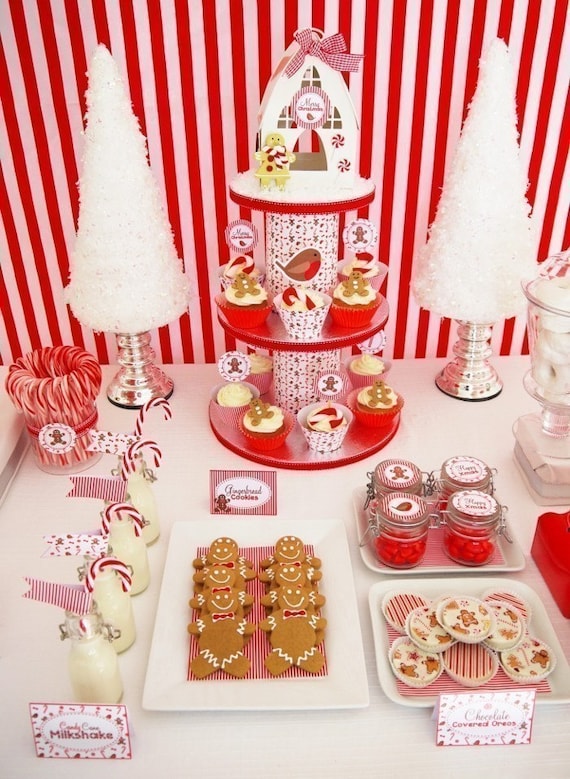
One of my favorite blog friends is Bird from Bird Crafts. I'm sure you've seen me posting abut her parties here and on Facebook and if you haven't already, you really must check out her site. In addition to sharing and planning fabulous fetes, like this Rainbow Party:
Bird also has some of the best tutorials around, like the how to for this cute cupcake stand:
That's what I love most about her - she doesn't just brag about her achievements. She wants to help her readers create parties that are as amazing as hers are.
So I was so excited when she signed on as part of PROJECT SECRET SANTA. Bird put together a terrific tutorial for how to make some super sweet Christmas trees that will be perfect for decorating tables at your Secret Santa party or could be a great craft for the guests too. Without further ado, here's Bird with all of the DIY details.
TUTORIAL: Paper Xmas Tree Decoration
Thank you so much to AFOMFT for inviting me to take part in this worthy cause for PROJECT SECRET SANTA! I think the fact that Jack looked so adorable with his little Santa hat in the picture helped a lot - I just could not resist!! :)
As a mom of two young children myself, I can't even begin to imagine what Jack's parents must have gone through, and I'm very glad to be able to help in any way to Jack's Toy Drive in memory of such a beautiful little boy!!
As I design and style printable children's parties, I thought today that I'd share a paper craft tutorial that's very easy and quick to make. These sweet paper trees will surely help to embellish any corner of your party table, mantle or kid's tables! Your little ones can also get stuck in and help with this easy and inexpensive craft! :)
What you'll need:
* FREE Paper Template - Download yours here
* Scrap-booking paper (I used the ones included in the Christmas Candyland Party Collection)
* Paper glue, hot glue
* Craft scissors
* OPTIONAL: Ribbon, buttons, pom-poms for embellishing the tops of the trees
Told you it was easy!
That's all folks, hope you've enjoyed the tutorial, and feel free to pop by Bird Craft Party Blogs for a chat and a slice of cake! ;)
XOXO

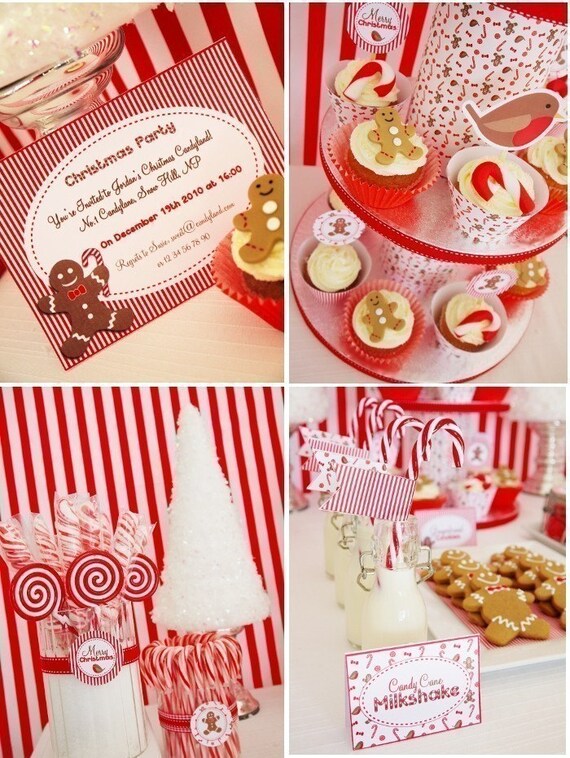
Isn't that fun? And Bird has generously offered her Christmas Candyland Printable Collection to AFOMFT readers who buy a toy for Jack's Toy Drive at a 50% discount! For just $7, you'll get all of these goodies:
CUSTOMIZABLE digitally by you:
* Party Invitation: 5" x 7"
* Rectangular food labels: 4 designs
* Fancy candy jar labels: 2 sizes
* Party signs: Use as table décor and more!
* Rectangular gift tags: 2 x Merry Christmas, 2 x Happy Holidays, 4 x "To and From" designs
* Blank Party labels: 4 designs to use as you wish!
* 2 " round gift tags: 2 x blank, 1 x Thank you and 1 x Merry Christmas
NON-Customizable Templates:
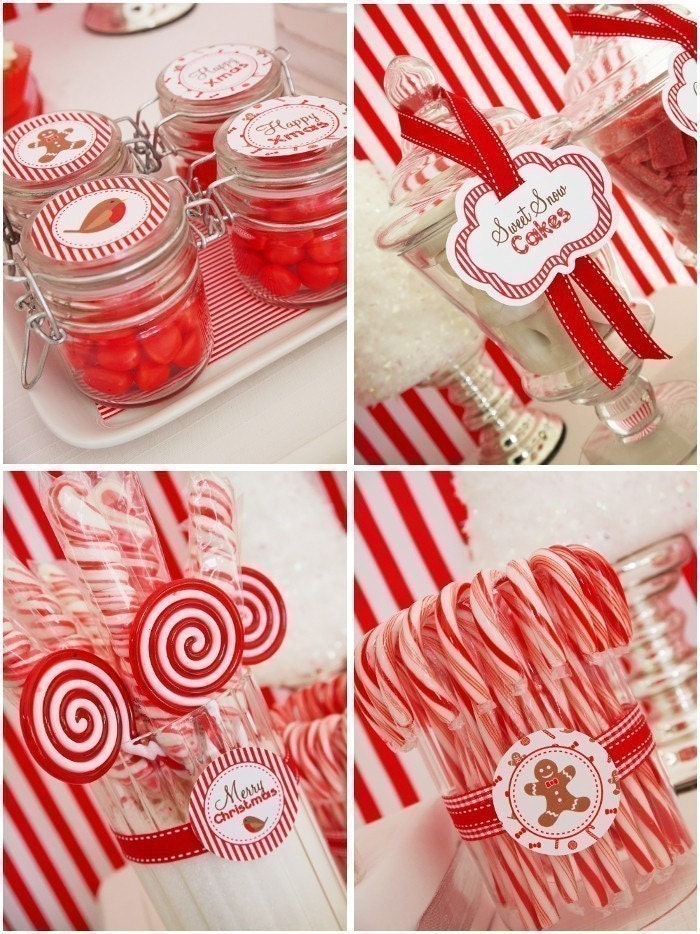
* Party icons: 2 sizes Candycanes, Robin. Use as toppers, table décor or use to make a garland!
* 2 patterned sheets: Festive Motif and Red and White Stripes
* Cupcake toppers: 6 designs, some read "Happy Xmas" and "Merry Christmas"
* Straw flags: 2 designs
* Welcome sign: 5" x 7"
* A4 Welcome sign 8" x 11"
* Candy bag horizontal labels: 2 designs that read "Take Out Xmas Candy"
* Cupcake wrappers: 2 designs
Who wouldn't love coming to a party with all of those marvelous printables? To get the 50% discount, buy at least one toy from the Jack's Toy Drive Amazon Wish List and then fill out THIS FORM. Once it's completed, you'll receive the discount code.
A hug thanks to Bird for being a part of PROJECT SECRET SANTA. To stay up-to-date on all of the tutorials, parties and freebies she has to offer, be sure to visit all of her sites:
{Blog}
{Facebook}
{Store}
{Twitter}
Monday, November 1, 2010
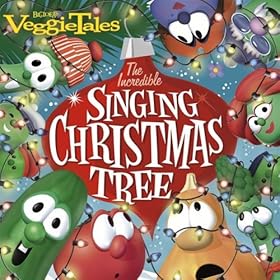
DEAL ALERT: The Veggie Tales Christmas Album {FREEBIE}
Sure, December 24th is still quite a ways away but you can start getting your little ones in the holiday mood with The Incredible Singing Christmas Tree from the Veggie Tales!
You can download 16 free Christmas songs from Larry, Bob and the rest of the crew for free here on Amazon. Enjoy!
Subscribe to:
Posts (Atom)


