Thursday, June 10, 2010

CRAFTASTIC: Baby Clothing Art

I have a huge container in Gabrielle and Alaina's closet full of clothes that they've outgrown.  My husband looks at it and thinks "Hoarder!" and while I will admit that I can be a pack rat, I've been good about giving away most of the things that no longer fit them.  But this container is filled with the pieces that have sentimental value, like the first outfits they wore in the NICU when they were barely 3 pounds.


And the onesies they wore on their first Valentine's Day.


And the adorable tees they sported for their holiday photos this year.


I could go on and on.  I've been holding onto them to make a quilt for the each of the girls but who am I kidding?  A quilter I am not.  Eventually, I'll probably pay someone to make them for me (maybe a few years from now when I can include their outfits from the first day of school, etc.) but in the meantime, all of those clothes are collecting dust.  Until now!  My hubby was out of town so I decided to attempt a different type of craft project with them and I'm pretty proud of the results.  In just a few simple steps, what started out as a collection of tees and onesies:


Was transformed into art!


They're cute, right?  The best part is that they're so so easy to make.  Here's what you need:

1.  Different sized wooden embroidery hoops.  I happened to have these five from my cross-stitching days so that's what I used.


2.  Paints and brushes. I used samples we had lying around from when I was planning the girls' nursery and foam brushes just because I like those.


3.  Whatever clothing you want to work with.  That's it!

The how to is pretty straightforward.  First, paint the outer rings of each hoop.


Then, let them dry for at least 30 minutes (I waited longer to be safe.  Actually, I tuned into the Glee finale and forgot about them so it was about an hour).  I laid the hoops out on wax paper and used the inner circle to prop the painted ones up and keep them from sticking while they were drying.


Timesaving tip:  You can actually skip the painting step altogether and leave the wood natural or buy the plastic embroidery hoops that come in fun colors like these:
Once the paint is fully dry, insert the smaller, unpainted hoop inside a piece of clothing and put the larger painted circle on top.  (I played with the hoops and shirts before I painted to see which size circle worked best with each one.)


Position the design where you want it and then tighten the screw to hold the hoops in place.


Once you have all of your clothes positioned, they'll look like this:


Then cut the excess fabric away and your art is done!

 
When I cut the fabric, I left enough excess so I can still use the swatches for a quilt someday and taped the extra back in the meantime.  Ta da!


I really love the way they turned out.  Not only are all of these fun appliques too adorable to toss but they all hold memories, if not for Gabrielle and Alaina, then for me.  I'm going to hang their clothing art collection in their room and may try to frame the photos that coordinate with them to put up too.  Once their "wall of fame" is complete, I'll post photos of the whole shebang.  And how fun would this project be for a nursery using the mommy and daddy-to-be's baby clothes?  The possibilities are endless!  Oh, and did I mention the cost?  Less than $10!  I worked with items I already had, but you can get five embroidery hoops for about $5 and crafts paints and brushes for another $5.  Not too shabby.

I hope this project inspires you to do something fun with the outfits your little ones have outgrown too.  If you do, please send pictures to afomft@gmail.com so we can show off your handiwork.

And because I know I'm going to get asked this, here's where all of the girls' fun shirts and onesies are from.


#1 & #6: Personalized embroidered baby onesies from Sheryl Sheehan (no longer available)

#2: Gingerbread girl tee (and the coordinating reindeer shirt in the holiday photo) from Bushel and a Peck Boutique

#3: Initial Valentine's tee from Peanut and Pumpkin Design

#4: Three hearts onesie from The Nook

#5 & #7: Felt initial onesies from Savvy Sarah Designs

Images: AFOMFT

Wednesday, June 9, 2010

AND THE WINNER IS....


Congratulations DIXON FAMILY!  You've won a set of adorable personalized bookplates from Jack and Izzy!  There are so many fun options to choose from and I can't wait to see what combination you pick.


Please e-mail me at afomft@gmail.com by end of day Friday, June 11th to claim your prize. If I do not hear from you by then, a new winner will be chosen.  And a huge thank you to Jack and Izzy for this fabulous giveaway!

Tuesday, June 8, 2010

YOU TAKEOVER TUESDAY: Going Organic {GIVEAWAY}

Today's YOU TAKEOVER TUESDAY question comes from Emily in Decatur, Georgia.  She writes:

Dear AFOMFT, I'm pregnant with my first child and anxiously trying to find some cute clothes that are 100% organic. To make things more challenging, I don't know whether I'm having a boy or a girl so I'm also looking for them to be gender neutral.  Help!   

There are quite a few lines that feature organic baby clothes right now but there's one in particular which I've seen and felt firsthand that I can personally highly recommend - Paige Lauren Baby.


Many of their pieces are made from 100% certified organic cotton, grown without the use of pesticides and colored with natural dyes.  And boy are they adorable! 


I love the story behind the line, too.  Paige Lauren is a Southern California born and bred designer who got frustrated with not being able to find simple, classic baby clothes to buy for her friends' children and decided to start making her own.  She got inspiration from her own childhood growing up by the beach and the result is a whimsical and relaxed line of kids clothes that you'll wish came in adult sizes too.


You may like what you see but trust me when I tell you that you will LOVE what you feel.  Paige Lauren Baby brags about having the softest baby clothes around and to prove it, they sent me a newborn shirt to check out.  I honestly do not have the words to explain how soft that shirt really is!  It was like velvet but even better.  They've earned the right to boast - if there's something softer out there, I'll be truly surprised. 

Paige Lauren Baby has a beautiful palette of colors to choose from, and Emily, you'll be happy to see that many of them can work for boys or girls.  This deep green, called Kelp, really shows off the contrast stitching.


And what could be cuter than their Classic Double Layer Crawler in Sol with the adorable butt flap on the back!


There's also an adorable new Heather Stripe fabric that's a great gender-neutral choice.


Since I have girls, it's should come as no surprise that I'm drawn to the pretty Flamingo pink.  This Long Sleeve Romper looks so comfy!


And I so want to get this dress for the girls to wear in our family pictures this summer!


The buttons down the back are so sweet!


Emily, I hope that the Paige Lauren Baby collections are the answer to your baby clothing question.  And if you register on their website, you can create a registry to share with friends and family who may be looking for the perfect gift to get your little bundle of joy.  To get you started, I'm going to send you the adorable newborn sample tee that Paige Lauren Baby sent me to review.  I know that after one touch, you'll be as hooked on their line as I am!


And I've got a great gift for one lucky AFOMFT reader too! Since they say feeling is believing (or something along those lines!), Paige Lauren Baby has generously offered to give away one Newborn Essentials gift pack, which includes a natural organic gown and matching cap and a classic superfine jersey white romper with feet.  That's a prize worth more than $100! To enter, visit Paige Lauren Baby and post a comment here telling me which of their pieces you like best (this is mandatory).  For additional entries:
  • Subscribe to AFOMFT or let us know you are a subscriber
  • "Like" AFOMFT on Facebook -- http://tinyurl.com/AFOMFTFBFAN
  • "Like" Paige Lauren Baby on Facebook -- http://www.facebook.com/pages/PAIGELAUREN
  • Ask your friends to "like" AFOMFT on Facebook by sending them this link - http://tinyurl.com/AFOMFTFBFAN - and post a comment here with the names of each one who does.  You'll earn one entry per new friend who "likes" our page and names will be cross-checked.  
  • Follow Paige Lauren Baby & AFOMFT on Twitter (@paigelaurenbaby & @AFOMFT or click the birdie icon on the sidebar) and tweet this post by clicking the graphic above or this giveaway:  #Win a super soft Newborn Essential Gift Set worth $100+ from @paigelaurenbaby @AFOMFT - http://tinyurl.com/AFOMFT
  • Click here to vote for AFOMFT on Top Baby Blogs and post a comment here that you did - Vote For Us @ topbabyblogs.com Top Baby Blogs.  You can vote once per day per computer so if you vote every day or on different computers, be sure to post one comment for each one.
  • Grab our button and put it on your blog or website and post a link here showing us.
  • Blog about AFOMFT or this giveaway (worth 2 entries so please post two comments) and post a link to the post.
Please leave a separate comment for each entry (two if you've blogged about the giveaway) and make sure to include a link to your tweet, blog post, etc. All entries must be posted on AFOMFT as a direct comment to this post.  Comments on Facebook will not count as entries.  This giveaway is open to residents of the U.S. and Canada and ends June 14th at 11:59 pm EST. The winner will be selected by random.org and announced on AFOMFT on June 15th. If the winner doesn't contact AFOMFT within 48 hours, a new drawing will be held so be sure to check back to see if you've won!

If you'd like help from A FEW OF MY FAVORITE THINGS or want to share something fabulous you've found, we want to hear from you!  Have a party theme but want help finding decorations?  Just redecorated your kid's room and want to show it off?  Shoot me an e-mail at afomft@gmail.com if you're on the hunt for the perfect product and just can't find it or if there's something you love and want to share. We'll do our best to help out and every reader featured on YOU TAKEOVER TUESDAY will receive a special gift from AFOMFT. What are you waiting for? Hit us up!

Please note that Paige Lauren Baby sent me a newborn shirt as a sample to review.  The opinions I've shared of their products are my own.

Images: Paige Lauren Baby

Monday, June 7, 2010

MULTIPLES MONDAY: Freezer Paper Stencil Tutorial

Welcome to MULTIPLES MONDAY, the CRAFTASTIC edition!  I wish I could take credit for this amazing tutorial but all of the kudos go to the uber talented Megan of MMMboppin'.  I found her blog after Lorie from the fabulous Be Different... Act Normal linked to one of my posts and Megan posted a comment in response.  She's a fellow-MoM so I automatically identified with her but once I saw her header....


I knew we were kindred spirits.  Any woman who quotes Hanson as words to love by is a friend of mine!

But enough about my bad taste in pop music.  Today's post is about some adorable TW-IN freezer stencil t-shirts Megan made.  You read that right - she made them!


And she tackled some TW-IN onesies too!


I know you want to make a set of your very own.  You're in luck because Megan's allowing me to feature her terrific Freezer Paper Stencil Tutorial here on AFOMFT!  And don't stop reading if you don't have twins.  You can make something fun for your little one - or yourself - too.  Let's get started!

Here's what you're going to need:


Freezer paper - you can buy this at the grocery store - it's like Waxed paper that's waxy only on one side

T-shirt or onesie

Exact-o knife 

Fabric paint

Sponge brush

A piece of cardboard

Something to cut on - a magazine will work

A design - For this onesie, Megan printed out an "S" for a friend's soon-to-arrive baby Susan.  You can find people's templates online, but she generally plays around with the fonts on her computer and gets free fonts at www.dafont.com. She also likes to use clip-art animal silhouettes.
And once you've got all the goodies handy, you're ready for the how-to:

    Step #1:  Cut a piece of freezer paper and tape it on top of your image. Place it so that the tape won't be on your image (ironing tape will make a sticky mess on your iron, so place the tape so you can cut or tear it off and not ruin your stencil later).


    Step #2: Begin cutting with your exact-o knife. The black parts are going to be the painted areas so cut away the black and keep all of the pieces that are white. When cutting the stencil, start by cutting away the pieces inside and working her way out. Throw away the black pieces that you won't need and hang onto the white parts that you will need as parts for your stencil later. Like this:


    Step #3: Once you're done cutting your stencil, prepare to iron it to your shirt. The waxy (it looks shiny) side of the paper needs to face the shirt when you begin ironing (keep that in mind when you are cutting your stencil!).  Megan secures the outline part of the stencil on the shirt first (she suggests looking at a copy of your design to help you figure out how it all needs to look).


    Step #4: Iron the inside parts of the stencil in place, so that the design looks the same as the one you started with (remember the parts that are black on your picture are the parts that will be painted).


    Step #5: Slide a piece of cardboard into the shirt to keep the paint from going through and then use your sponge brush to paint the shirt with fabric paint. Make sure you paint it pretty thick to cover the stencil well. Let the paint dry for at least 10-15 minutes.


    Step #6: After 10-15 minutes, peel off the stencil. If the paint is still wet, use caution so you don't smudge or smear it. First, grab a corner of the freezer paper and pull.  The outline stencil should peel right off the shirt. 


    To get the stencil pieces in the middle of the shirt that you're painted over, grab a pair of tweezers and pinch a piece of the inside stencil with them and pull. Works like a charm.


    Step #7: Take a step back and admire how dang cute your shirt turned out and imagine how adorable your favorite baby will look wearing it! Ta Da!


    Want to get a little fancier?  Try using a Cricut machine to cut out your stencils like Megan did for the stars above.

    For more great ideas and a daily dose of humor, be sure to visit Mmmboppin'.  Megan's blog is as catchy as the Hanson song it's named after, but a whole lot less embarrassing for me to admit to liking!

    If you try this project or have a CRAFTASTIC project of your own, we want to hear about it!  Send us an e-mail along with some pictures so we can feature your handwork here on AFOMFT. 

    Images: Mmmboppin'

    AND THE WINNER IS....


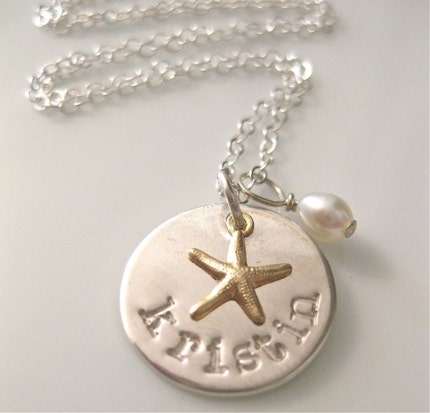
    Congratulations THE DEAKINS!  You've won this beautiful Sea Star necklace from One Life Jewelry!  It's the perfect piece for any summer wardrobe.


    Please e-mail me at afomft@gmail.com by end of day Wednesday, June 10th to claim your prize. If I do not hear from you by then, a new winner will be chosen.  And a huge thank you to One Life Jewelry for this wonderful giveaway!